

Walkthrough for Dagdrøm
Stuck in Dagdrøm? Fear not: You have come to the right place.
PREFACE
Dagdrøm is a challenging old school adventure game, but before you check the walkthrough remember:
- The game has an in-game hint system. Press speakers throughout the world to get cryptic tips (Act I and III).
- The Travel Guide in your inventory offers some hints as well (Act II and III).
- Read the visual walkthrough that can be accessed from the pause menu. This should help in most cases.
If none of these work for you, read on!
ACT I
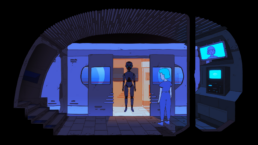
Leave your apartment and go The Control Centre in The Train Station. Talk to The Station Agent and she will tell you that you will need three things: The Gold Ticket, The Travel Guide and a weapon.
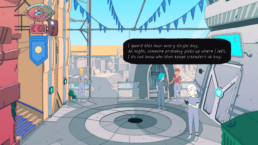
The Common Area
The Control Center
The Station
Get The Dream Tea
Some NPCs will give you hints about the night time. Accessing the locations during night is key to progress in the first act.
Go to The Eye Bar and talk to The Bartender in the first room. She will give you a container and ask you to fill it with The Dream Juice. You’ll need to direct all the leftovers of the oil to your apartment. To do this you must interact with multiple panels. The oil will start to flow through them when you get it right:
- The Roof Terrace: All three displays must point downwards.
- The Station: The display must point upwards.
- The Common Area: Both displays must point upwards.
- The Hallway outside your apartment: Both displays must point upwards.
OPTIONAL: You can pick up a map of the tubes in The Arcade. Talk to The Game Master to get free tokens. Use it on the One Eyed Bandit, her favorite, to win the map.
Use the container on the valve in your apartment (behind the larger cupboard). Return to The Eye Bar and give the filled up container to The Bartender. You now have The Dream Tea.
The Dream Puzzle
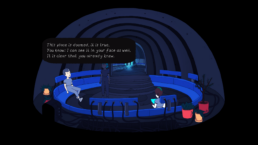
Go to your apartment and drink The Dream Tea before going to bed. This will enable The Dream Puzzle. Locations are randomized here, but the only constant is that there is two directions: Left and right.
Complete The Dream but remember what you picked (for example Left, Left, Right). Drink The Dream Tea again and go to bed. This time repeat the same directions. When The Dream is completed you have access to nighttime simply by going to bed.
The Hallway
The Eye Bar
The Day/Night Atrium
Get a weapon
While still night, visit The Bottomless Library to pick up your advertised book. The different floors of The Bottomless Library count backwards. The first floor (with the glass dome) is 1. Once you go down one floor you are at the second floor, and so on. Go to the second floor and use The Book Slip on the bookshelf with a diamond symbol. Go back to your apartment and go to sleep (to get back to daytime).
Go to The Eye Bar and give The Book on Altruism to The Gamer, in the second room. She will read it at night, causing her to return to The Red Arcade and win The Sharpened Knife, which is the main prize. Go to bed and sleep until the next day. Unfortunately she has given her prize away to The Vendor, located on The Roof Terrace. Talk to her to find out about what she wants (horticultural insight). Return to your apartment and go to sleep.
Once nighttime has come, a new book is waiting for you. Go to The Bottomless Library, pick up The Book Slip and go to the fourth floor. Use the slip on the shelf with a wave symbol. Return to your apartment and sleep until day.
Go to The Roof Terrace and give The Book on Gardening to The Vendor. Now you have The Sharpened Knife.
Get The Moon Flower
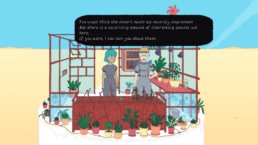
Acquiring both The Travel Guide and The Gold Ticket is connected. Go to The Roof Terrace and get The Moon Flower Seeds from The Vendor. Plant them in the vacant flower pot on the same location.
Go to your apartment and go to sleep. While it is nighttime, go to The Roof Terrace again. Inspect The Glowing Moon. You will need to “water” the flower pot with the correct amount of The Dream Juice. Markings are hidden in three locations: The Common Area, The Red Arcade and The Roof Terrace. These markings shows how many times you need to water the flower pot in any given moon cycle:

Water once with The Dream Juice or Tea
Water twice with The Dream Juice or Tea

Water three times with The Dream Juice or Tea
Once you have watered the correct amount, return to bed and sleep until day. Return to The Roof Terrace and pick up The Moon Flower.
Get The Gold Ticket and The Travel Guide
Sleep until night and go to The Sun/Moon Atrium. Interact with the stones to make it day (at night). Go to The Common Area. The center door is now open (since you have set the world to day), but The Honest Guard is not guarding it (since it is still night). You can now access the red and green zones. Pick one.
Once in the parallel zone, go to “your” apartment. Exchange The Travel Guide with The Moon Flower in your inventory. Return to the blue zone and to your apartment. Go to sleep.
Once it is day time, go to your neighbors apartment and exchange The Moon Flower with The Travel Guide in your inventory. Your neighbor will give you The Gold Ticket. Return to your apartment, go to sleep and make it become day (at night) again. Leave for the zone you haven’t visited before. Go to “your” apartment and exchange The Travel Guide with The Moon Flower. Return to the blue zone and go to sleep.
Once it is day time, go to The Control Center and talk to The Translator.
The Red Arcade
Your Apartment
The Train Platform
Travel with The Trans-Wasteland Express
Leave The Control Center and go down to The Train Station. The building will rotate, changing the three exists to new locations:
- The Common Area becomes The Round Library
- The Round Library becomes The Red Arcade
- The Red Arcade becomes The Train Platform
Go to The Train Platform and insert The Gold Ticket in the ticket machine. It breaks down and you need to fix it. Leave and go to The Round Library. The Librarian states that all rules are off after the station has rotated and gives you The Book Slip. Go the fifth floor and drink The Dream Tea. You are back in The Dream Library and the symbols on the shelves change. Use The Book Slip on the shelf with an eye symbol.
Leave and go to The Train Platform again. Use The Book on Machinery on the ticket machine. The machine boots and The Trans-Wasteland Express arrives. Leave with it.
ACT II
Go to The Market and interact with The Gold Cup.
The Cave Puzzle
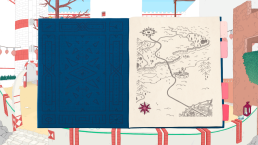
Check out the map in the walkthrough in the pause menu for this one. You will need to change the directions on the bottom three times:
- UP – UP – DOWN – DOWN – UP (to get The Light Node)
- UP – UP – DOWN – UP – UP (to use The Light Node on The Broken Button)
- UP – UP – UP – UP – UP (to exit The Bottomless Cave)
The Market
The Plaza
The Waterfront
Accessing The Kitchen
Go to The Kitchen and pick up The Handnet. Go to The Plaza and use The Handnet on The Poison Mushroom on the wall to the right of The Believer to pick up The Doom Shroom (you can carry three at any one time).
Return to The Kitchen and walk behind the wall behind The Cook. Use The Doom Shroom on his soup. After he passes out, pick up The Soup Bowl (you can carry five at any one time) and The Salt Crystal.
Make Doom Shroom Soup
Go to The Waterfront and use The Sharpened Knife on the yellow water hose. Drop The Salt Crystal in the water to make it salt. Fill a couple of bowls with salt water. Go to The Market. The tree has nine birds divided into three levels of branches. Only one bird can tweet on each level. A pattern example:
3rd level: Tweeting bird – silent bird – silent bird = left (third floor)
2nd level: Silent bird – tweeting bird – silent bird = center (second floor)
1st level: Silent bird – silent bird – tweeting bird = right (first floor)
Follow this pattern to reach The Butterfly Hut on the top of The Round Tower. Use The Handnet on The Butterflies to pick them up (you can carry three at once). Use The Water Bowl on the soil and match the amount of water bowls with the open windows to get the correct balance between air and water. Once The Eternity Vines grow up, use The Sharpened Knife on them to pick them up (you can carry three at once).
Go to The Kitchen. Use The Water Bowl (1), The Doom Shroom (1) and The Eternity Vines (1) on The Cooking Pot. Use an empty bowl to pick up The Doom Soup. The Eternity Vines secure a long lasting effect.
Access The Stone Golem
Drink The Doom Soup. Remember that it must be made with The Eternity Vines for it to work for a sufficient length of time. Once you wake up, go to The Waterfront and pick up The Night Lily (you can carry three at any one time). Drink The Doom Soup again to return to daytime.
Go to The Kitchen and drop a bowl of salt water, The Butterfly (1), The Night Lily (1) and The Eternity Vines (1) in The Cooking Pot. Pick up The Stealthy Soup. Go to The Market and drink The Stealthy Soup. You will become invisible (from The Night Lily ingredient) and completely silent (from The Butterfly ingredient). Enter the tower of The Stone Golem.
The Butterfly Hut
The Travel Guide
The Round Tower
Command The Stone Golem
Interact with The Golem Computer:
- Buttons 1-8: Plays notes from a scale
- Button 9 (Play symbol II): Plays the melody required to toggle The Stone Golems arm (idle or pointing)
- Button 10 (Play symbol II): Plays the melody required to rotate The Stone Golem angle (left and right)
- Button 11 (X symbol): Deletes your current recorded melody
Correct combinations:
- Rotate The Stone Golem left: 1-6-4-2
- Rotate The Stone Golem right: 2-4-6-1 (reverse of left)
- Toggle The Stone Golem arm: 3-2-5
Toggle The Stone Golems arm to pointing and rotate to The Petrified Forest (tree symbol) or The Red Bridge (bridge symbol). Leave and talk to The Golem Guard until he notices The Stone Golems “command”. Drink The Stealthy Soup again and go to The Stone Golem. Rotate the statue to whichever one you didn’t do last time (The Petrified Forest or The Red Bridge). Leave and talk to The Golem Guard.
Go to The Waterfront and talk with The Golem Guard and The Enlightened Florist. Drink The Doom Soup twice, until it becomes day. Go to The Plaza and leave with The Trans-Wasteland Express.
ACT III
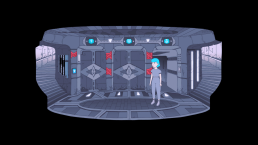
Turn on The Power
Use The Handnet on the right door opening. Enter the left door opening to access The Power Room. Interact with The Power Cabinet. In this sound based puzzle you must repeat randomly generated melodies with increased difficulty. The play button generates a new melody. The X button deletes your current recorded melody. Complete the four melodies:
- Coffee cup symbol (meaningless)
- Speaker symbol (restores power to the musicians)
- Globe symbol (meaningless)
- Moon/sun symbol (restores power to the lamp next to the power cabinet)
You must sabotage The Power Cabinet to make sure The Security Guard doesn’t turn off the power again. Use The Moon Flower Seeds on The Power Cabinet. Interact with The Lamp until the moon setting turns on. Leave and go to The Arrival Hall.

The Escalator
The Arrival Hall
The Power Cabinet
Get The Band together
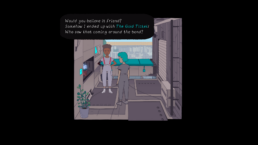
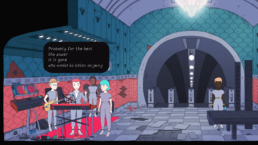
Every single band members needs something to be able to play. Give The Travel Guide to The Piano Player (it has sheet music). Pick up The Mirror from The Power Room, and crack it with The Sharpened Knife. Give it to The Bass Player (suddenly he is capable of seeing a nuanced self-image). Use The Sharpened Knife on The Separatist Mask until it becomes The Cat Mask. Give it to The Steadfast Drummer (granting him the anonymity he desires).
Once the band has started to play the song, but failed miserably to stay in sync, talk to The Steadfast Drummer and get The Metronome without batteries. Pick up The Megaphone and use The Sharpened Knife on it to extract The Batteries. Use The Batteries on The Metronome, and give it to The Piano Player. The band starts playing and The Security Guard is captivated. Walk through the security control and leave through the door on the right.
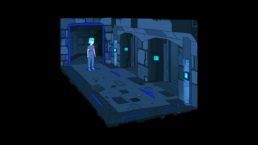
The Trials (1-3)
You have now entered The Trial Rooms. Each floor has a three rooms (well, almost all floors). The icons on the panels are the key to solving each room. The blue dots on the screen defines the amount of blue buttons must be used on the left panel to progress.
I.
- White heart + White heart: Match both panels, but remember; only one blue button.
- White mountain + Black mountain: Invert both panels with one blue button on the left.
- Black mountain + White mountain: Use the same panels as in the last room, but switch their positions.
II.
- White snail + Black flipped snail: Make two blue buttons on the left panel. Invert the red panel and flip it horizontally.
- White snail + White sun: Match the left panel with the left panel from the previous room. Make a random shape on the right panel, but remember the combination.
- Black snail + Black sun: Match, but invert the left panel from the previous rooms on the left panel. Match, but invert the right panel from the previous room on the right panel.
III.
- White diamond + Black saturn: Make a random shape on the left panel, but remember the combination. The right panel works as a “room chooser”. Blue on the top left button only leads to room two. Blue on the bottom right button only leads to room three.
- White knife + Black flipped knife: Make a random shape on the right panel, but remember the combination.
- Black diamond + White knife: Match, but invert the left panel from the first room on the left panel. Match, but invert and flip horizontally the right panel from the second room on the right panel.
The Butterfly Hut
The Travel Guide
The Round Tower
The Trials (4-6)
IV.
All the panels are broken on this floor. Advance and progress to the next.
V.
- White triangle + Black triangle: On this floor you must invert the panels like before, but some buttons are missing. Make three blue buttons (or two, if the hidden randomized button turns out to be blue) on the left panel. Invert on the right panel.
- White wave + White flipped wave: In this room you must flip the button combination horizontally on the right panel. Remember that hidden buttons are randomized (can be blue or red).
- White zigzag + Black zigzag: In this room you must invert the panels. This is probably the most difficult trial room, since there are three hidden buttons (each might be blue or red). A tip is to first make everything on the left red and everything on the right blue. From there, try different combinations!
VI.
- White infinity + White infinity: Make two blue buttons on the left panel, but remember the sound. Find the matching sounds on the right panel and make them blue as well.
- White squares + Black squares: Make three blue buttons on the left panel, but remember the sound. Find the matching sounds on the right panel and make them red.
- White square shape + White square shape: In this room all buttons are randomized on the left as well. Match four blue buttons (sounds) on the left with the corresponding four buttons (sounds) on the right.
The Trials (7-9)
VII.
- Blue moon + White moon: Inspect the floor tiles on the right side of the room. Make one blue button in the center of the right panel, and make the rest red. Invert on the left panel.
- White heart + Black pierced heart: Study the juice spills on the floor tiles and fill in the buttons correspondingly. On the left panel the oil spills equals blue buttons (three total). On the right panel the oil spills equal red buttons (three total).
- White square shape + ?: Make a shape on the left panel and remember the combination. Drink The Dream Tea and notice that the potted plants flips both vertically and horizontally. Fill in the right panel accordingly (invert and flip horizontally and vertically according to the left panel).
VIII.
- White flower + White flower: Inspect the roof and fill in the panels accordingly with blue buttons (three on each side). Notice the mechanism to the right. You can use this to toggle between the two middle rooms. Set the mechanism to three a clock to enter room 2.1, and to twelve a clock to enter room 2.2.
- Two middle rooms:
- Pick up grey travel guides on the left and everything you can on the right (including The Red Bugs who appear). Use the mixing area in the center to make colored guides:
- The Solvent Bottle (1) + The Red Bugs = red travel guide
- The Solvent Bottle (1) + The Yellow Dye + The Blue Dye = green travel guide
- The Solvent Bottle (1) + The Yellow Dye = yellow travel guide
- Talk to or give the correct travel guides to The Gardener. Inspect the tree and remember the bird combination. There are nine birds, each corresponding a button on a panel in the next room. Active birds equals blue buttons, inactive equals red.
- Pick up grey travel guides on the left and everything you can on the right (including The Red Bugs who appear). Use the mixing area in the center to make colored guides:
- You must do two things to progress from this room: Match the right panel with the bird combination from the last room. And drop every inventory item you can in the two hatches to the left and right. If you have The Handnet, drop it in the left hatch. All other items must go in the right hatch.
IX.
The instructions on this floor are no blue buttons. Make all six panels completely red and interact with the secret exit in the center of the room. Leave The Trial Rooms.
The Butterfly Hut
The Travel Guide
The Round Tower
The End
Click on the button (twice) to open the door. Once inside The Laboratory click on The Moon Flower. This will open a hidden sliding door to the right. Leave through it.
Once in The Office Room click on all the cupboards to open them. After the transition click on The Blue Dome. Use The Sharpened Knife on the NPC. Congratulations on completing Dagdrøm!